I finally got the first two rolls from my first experience with the Fuji G617 panorama camera developed and scanned. The first two rolls were basically just tests to see how my exposures were and if I remembered to remove the lens cap etc! Basically test shots to learn how this beast of a camera exposes and if I’m using it correctly.
So let’s get to it, what do they look like? Here’s 3 scans for you, click to see them large:

They’re just test shots and very ordinary photos but considering they’re my very first shots with a 617 panorama camera I’m strangely excited about these photos! The learning process is great fun – never mind the totally shitty results 😀 There’s just something special about holding a 6×17 cm transparency – and then seeing it come to life on the monitor as the scanner works it’s way through the image. It’s also an extremely slow work process from exposure to file on screen and I wish the 617 camera just had a memory card slot!
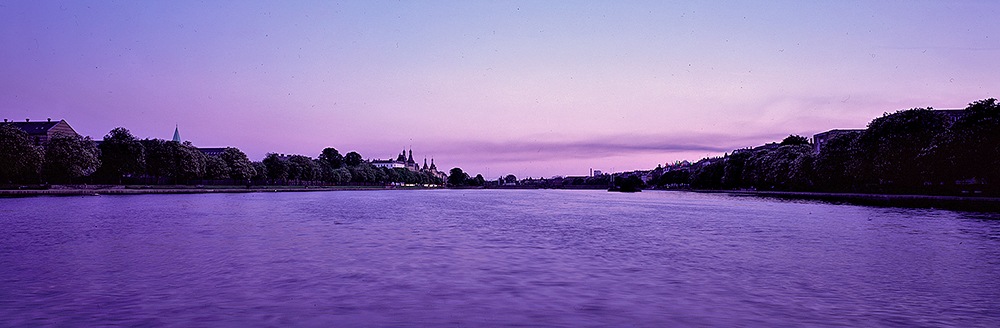
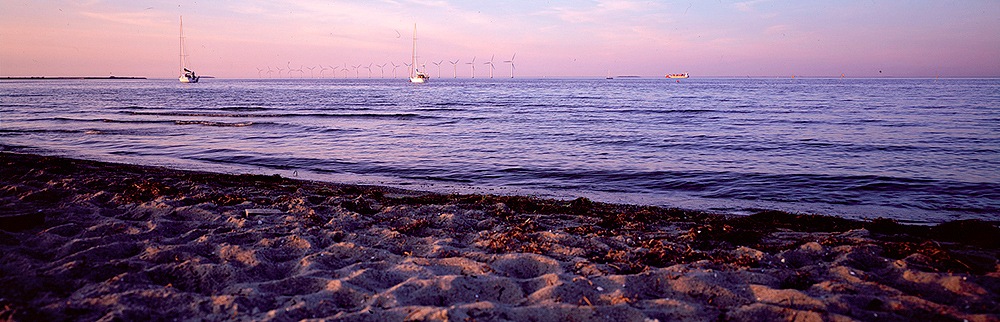
The first shot is from the end of Lake Peblinge in Copenhagen looking towards Søtorvet. If you know this place you get a good feeling of how incredibly wide a view a 617 camera at 105mm (35mm equivalent is about 24mm) gives you! In this case I would have liked to zoom in a lot more. I do like how this wide view and a second and a half of exposure makes Lake Peblinge look like an ocean. The other two shots are from the beach at Amager Strandpark and the very first shots I ever took with the 617.
Both shots are shot on Fujichrome RVP Velvia 50 Professional color slide film and scanned on a Imacon Flextight 848 scanner at 8000 dpi. I didn’t save the scans at full resolution but still brought home tiff files that are 23,000 pixels wide!
You may wonder about the purple and magenta colour cast but that comes from using a daylight film (about 5400 Kelvin) at a sunset at 9PM here (where the colour temperature is much much warmer, almost twice as warm). This could of course be “corrected” (it’s an artistic choice) in Photoshop or by shooting with filters but I wanted to present the scans as they are. The files above have received no post production at all except for levels and sharpening and conversion from AdobeRGB to sRGB colour space.
Random notes about the first few 617 exposures and the scans
- Using my Canon 5D as a light meter works fine, but I can see the slides are a bit underexposed. With the way I meter light I need to add almost a full stop to the exposure on the 617.
- These were shot at around f/22.0. I can see I really need to stop down a lot more to gain more depth of field. The middle shot is composed with the camera close to the sand and the foreground is very soft (more noticeable in the 23,000 pixel version!)
- I just lurrve the colours and saturation of the Velvia film!
- The built in level works very nicely, I ended up with some fairly straight horizons!
- I rented time on the Imacon scanner at Fotografisk Center in Copenhagen and what a nice Digital workshop they have and it’s cheap to rent time as well. Great place, recommended.
- The Imacon is a world class scanner and the results are very nice indeed and the scanner was a joy to work with (the Flexscan software could be better though). I scanned a few 35mm shots as well just to test it and got some nice 13,000 pixel wide scans!
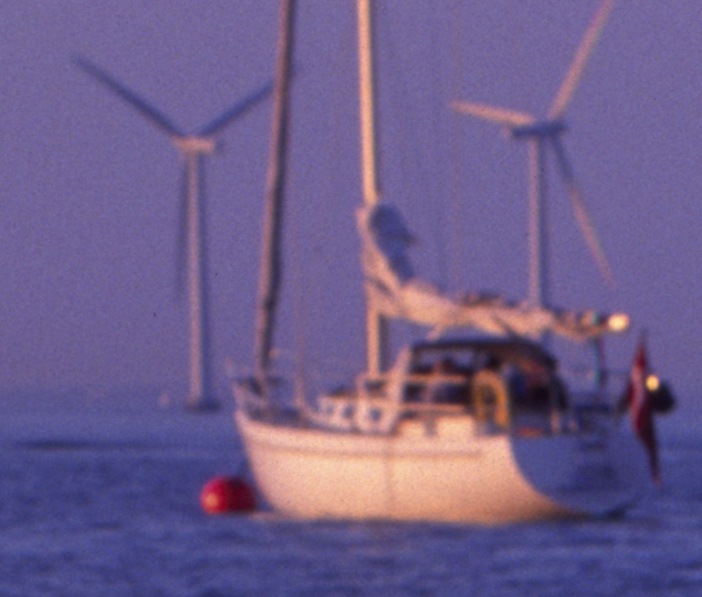
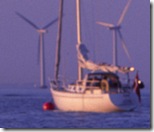 Compared to a super clean iso100 digital raw file from my Canon 5D the scans are of course grainy and soft. We forgot how much grain is in film, even a 50 asa super fine grained film. Of course I’m looking at a 8000dpi scan at 100% but still – a pro level digital raw file is soooo much cleaner. Click the photo to the right to see a small crop of a 100% view that shows you the grain (and also how large the scan is, this is a small boat on the horizon in the original shot)
- Dust…at 8000dpi every single tiny dust spot shows very easily on the scan no matter how much I thought I cleaned it, a 100% view reveals some nasty dust. Takes a LOT of healing in Photoshop to clean up the scans (fortunately I own Noise Ninja software but still you need to a LOT of cleaning).
- I should have shot some digital shots on that first evening as well so I could really compare the exposures. Me and my mate Markus were just too busy with the 617 camera so it slipped my mind and the light was disappearing rapidly anyway.
So – first test process completed! I managed to actually expose something on the transparencies and my 617 panorama adventure can continue. Now I just need to figure out a way to carry all of this gear on my bike without being too much of a danger to myself and the rest of Copenhagen. If you see me out there on the bike paths keep your distance please!
EDIT: It’s actually also nice to know that I haven’t become 100% dependant on digital technologies. I can shoot a photo on a 100% manual camera as well and still have it come out alright.
8 Comments on “My first 617 panorama exposures are online”
Good to see you are using film.
I must say I don't miss using film at all but I admit I have become lazier using digital and still need to remind myself to slow down.
The best thing about using the 617 is that what you see through the viewfinder you get, no guessing with the stitching. Also, you can photograph waves.
Keep up the shooting.
Hi James. Yeah I agree about the viewfinder, great to be able to actually compose panos right in the viewfinder!
Welcome to my world Flemming… despite my 1ds Mark II and the panoramic head I still love shooting with my G617 and velvia film. The results are hard to beat.
Rate your velvia 50 film to 32 iso… might be hard to meter at that iso if you are using your 5D.
Hi Matt and thanks. Yeah I meter with my 5D, at iso50 and f/22 – I then basically double exposure, set aparture on the Fuji to f/32 and open up almost a stop.
I'm guessing you have the center filter for the G617 so your adding a stop for that. On the G617 the sweet spot for shooting is F16. If you need any tips / advice on shooting or exposing your velvia 50 or with the G617 feel free to drop me an email.
Good to know about the f16 sweet spot, will try that next time. I'm adding about 2/3rds of a stop because the iso50 seems to behave more like iso32 – as you also pointed out.
Sorry, but you have some missconception regarding the Imacon 848. It is true that this scanner can do 8000DPI but only with smallformat 135 film. With 120 film the max resolution drops to 3200DPI. With 5×4 sheet film it drops to 2040DPI. That is because the scanner uses a single row sensors and the film is projected onto this row with a quite sophisticated lens system. As a result the DPI drop the larger the negative.
Your 617 images have been scanned at 3200DPI, which results in 22000 to 23000 pixles on the long side; there has been no reduction as you mentioned but you got the full potential of the scanner.
I own an Imacon 646, which uses the same scanning unit but is a bit slower.
Thank you for correcting this.